Pre-K, Kindergarten, First, Second, Third, Fourth, Fifth, Sixth, Seventh, Eighth, Ninth, Tenth, Eleventh, Twelfth, Higher Education, Adult Education, Homeschooler, Staff - TeachersPayTeachers.com

Guided Reading Level A Books with 3 Activities for Young Students

My sweet student I will call "Bob" came over to the guided reading table to read with me.  When I open the level A book, he began to read the pictures, pretending to make up the story as he went along.  

Bob wants to read, but lacks the understanding of how print works and that there is a relationship between letters and how they connect together with sounds.  When I look through my 6 pack of readers, even the A levels seems to be a bit difficult for Bob.  After reviewing all the letters and sounds, it is time to start with guided readers. 

The first step is to teach Bob to move his finger from left to right across the page. Bob already realizes the pictures do have a connection to the story because he is reading the pictures! Celebrate!

The next step I will move Bob through is that there is a correlation from letters to words and how these words connect with the picture.  The words on each page are very predictable so that Bob will see these words repeated and have similar phrases on each page

We start with the first word.  I will break down that word one letter at a time.  For example, if the word is "Cat."  I will say, "Can you point to the first word?"  They point to cat.  

Teacher: What is that letter?

Student: C

Teacher: What does C say?

Student: /c/ making the hard c sound.  

Teacher: Great! What is the next letter?

Student: A

Teacher: What does A say?

Student: /a/ making short a sound.

Teacher: What is the next letter?

Student: T

Teacher: What does T say?

Student: /t/ making the /t/ sound.

Once the sounds are established, model the three sounds.  You said that C says /c/, A says /a/, and T says /t/.  Then say the sounds together. /C/A/T./  Cat! Have the student repeat the sounds.  

That may be all you work on that day, depending on how long that took.  Otherwise read until the child comes to a word that stumps them.  Break each word down.  

You might make a 3x5 card of the word CAT and have the student wear it around their neck, put it on their name tag for reference throughout the day, occasionally asking them what is that word as you randomly walk past their desk.  

This was an example of guided reading for one student.  But the process is the same if you work with 6 students.  You go around the table and work individually with each child that is at your table.  Have other students work on their copy of the same book, or if they finish, they may read one of the books they brought over while they wait for you to get to them.

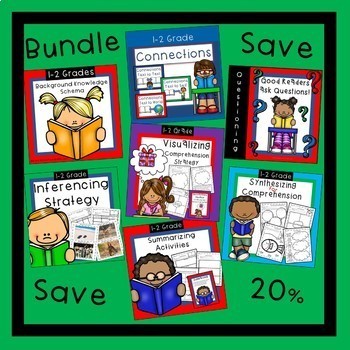
Finding the activities and level A books to work with students at this level can be difficult.  My library consisted of only 2 level A books because publishing companies assume students coming into first grade should be reading at level C.  I needed more books and so I went to my computer to create level A books and activities to do with my students.

If you need books and activities, click on the pictures that will take you to this resource.  Please let me know if you have questions regarding teaching students that are reluctant to begin reading.  I would love to help you with ideas. 


If you have questions or are interested in more reading resources, click on the following link,


How to Teach 5+ Fun Comprehension Skills to Primary Students

Last year, I sat down at my guided reading table to work with a group of very good readers.  I usually have 4-6 readers at my table.  This particular group was 6 readers that could read at a level L.  As I opened the book up for discussion, there were great comprehension responses to the texts that "wowed" me as a teacher. 

However, there was one student that remained fairly quiet. I dismissed the other readers back to their seats and turned to the quiet student.  I asked him a simple comprehension question. He couldn't reply with an answer. I got that "deer in the headlight" look.  So, I decided I needed to zero in a little closer with him to see if there was an issue with comprehension.  I listened to him read a portion of the text again and then asked a few simple questions.  He couldn't give me an answer although he could read extremely fluently.  

This story replays often every year with fluent readers.  They can read anything you set in front of them, but cannot answer basic comprehension questions.  They have mastered the reading, but aren't thinking about the story or comprehending what they are reading.  

To be a good reader, students need to think about what they are reading. This actually takes a skill that sometimes has to be taught.  Students know they need to string letters together to make words, but sometimes they don't realize or understand that these words together have meaning.  It seems simple enough to children when this comes naturally, but a few strategies of reading comprehension will help those that this does not come naturally.  

Comprehension is thinking about what you are reading.  

There are several comprehension strategies that can be used to help students or young children begin to think about what they are reading. When introducing these strategies, I start with an anchor chart. This is the big paper that can be made into large posters to hang while you are studying a concept.  I place all of these on a comprehension wall that we refer back to over the course of the school year. At the end of the year, students often beg to take them home as souvenirs.

The strategies are taught for 2-3 weeks.

  • Connections

Connections are when you as the reader connect what you are reading to something else in your life.  Sometimes this is another book, text to text.  Sometimes, this is an event in your life, text to self. Sometimes this is a connection to something in your world, text to world. Examples of text to world are holidays, public events, or articles related to the book.  When I taught 3rd grade, I taught each of these connections for a week.  Now that I teach first grade, I usually linger on a strategy for 2-3 weeks.


  • Background Knowledge also known as Schema

Background knowledge is just simply what your readers already know about a subject.  Students may read a book about a birthday party and understand the context because they have had a birthday party or have been to a birthday party.  Similarly, if they read about a dog and have a dog, they will have schema or background knowledge about dogs, the subject they are reading. 


If students read about a wobbegong and have never seen a wobbegong, they wouldn’t have a clue about what they are reading, nor would I.  I had to look it up. No, seriously. I had to look it up.


In addition, I can’t pick up a neurosurgery book and understand what I am reading. I would lose interest pretty quickly because I don’t have the background knowledge for these areas.


  • Visualization

I teach this to young students as 'a movie in your head.'  We pop popcorn and drink mini sodas. I set up a mini movie theater background and put it behind me while I read a book. I don’t show them the pictures.  I ask them what they are visualizing.  I also give them a piece of blank paper and have them draw what they are seeing in their head. I repeat the term visualizing repeatedly to help them remember.  I might say, “What are you visualizing?” as they draw their pictures on clip boards. 


After the students have completed their drawing, I show them the illustrations to compare. Sometimes students have very similar ideas about what they are visualizing as the illustrator.  They love to compare their drawing to one another as well.


  • Inferencing

This skill is when you know something about the book that isn't written in words. 


For example, "My sister hit me really hard.  I turned and looked at her with a grimacing face.  My mom knew how I felt."

The text never says she is mad or hurt, but you can inference this because of the choice of words the author used.  As adults you inference when you read mystery novels or “who done it” books.


  • Questioning

This strategy can be taught by teaching students to ask questions about what they are reading.  Many times, we ask the questions and expect them to answer.  We forget to have students ponder, or wonder about their reading.  Ask them what they wonder or if they have questions about their reading. Give them time to think about their questions.  Even if they come up with outlandish questions or far-reaching questions, it is leading them in the direction of thinking about what they are reading.

For more help or information to teach the strategies, click here!

👉 Reading Comprehension Strategies Bundle


Comprehending reading will open new worlds of fun reading to your child or students.

For more information or companions and printables that will help you teach these comprehension strategies, visit  at Robin Wilson First Grade Love on Teachers Pay
Teachers.com.

You can teach this with books that you read with your students or with your child.  If you are interested, I have already created many book companions that follow this plan listed above.

Click on the pictures of these book companions that will help you teach comprehension strategies to save time.


Thank you so much for checking out these products! Visit
👉 Robin Wilson First Grade Love for more book companions to teach comprehension strategies!


9+ Activities to use with Room on the Broom Comprehension

Do you just love the book, "Room on the Broom?" It is one of my favorite books to read around Halloween.  I love to have the students get comfortable, pull up close on the rug, and listen as I read with all the voices of the characters! 

Get Ready for the First Week of Back to School for First grade


Are you ready for back to school night or that first week? Me either, but I am trying so hard to get ready.  I created some things that will help us get ready. Click on the picture for more information or read more below to help you get started. 


10 Days of Fun Snow Day Activities to do with Kindergarten and First Grade


You wake up and hear the weather report for tomorrow! Snow is coming!! As a teacher, you know you need to have something ready to go home by the end of the day just in case the powers that be call a snow day or two or three! 

I got you! Click on the pictures to buy now! 


  • I created ready to go, no prep, snow day packets for this scenario!

  • Included in these packets are ready to print cover pages and many, many language arts and math pages to choose from to send home.  Also, if you are covering a standard and want to poke in an extra page or two of practice from your own curriculum or workbooks, just slip them in too!

  • There is a letter for parents explaining the packet. Also in this letter are choices students can complete for their specials.  For example, if it's art day, draw a snowy picture of what is outside your window. Or if you have gym, one of the choices is to dance to a song on the radio or tv. (You know they will have their favorite cartoon going, and they can totally dance).

  • I just highlight on the parent letter what special day it is: Gym, Art, Music, Library!

  • Here is a kindergarten packet with answer key! And a First Grade packet below! Just click on the picture for more information or to purchase.  


  • Annnd, the First Grade Packet is here!


To get these packets, click on the pictures!

  • I have now bundled these two products together to make it easier and to save money.

  • In many places around the world, it snows and can snow a lot! It may snow for many days and schools will "call a snow day" because the weather is just too bad for students to be out.   That simply means schools announce that students will be learning from home due to the weather.  Sometimes weather days are also 'called' in warmer regions for other reasons such as freezing roads, flooding, or emergency closings due to school repairs.  

This packet will actually work for any reason you are learning from home. Recently, many teachers used this packet as a filler for hybrid teaching during the Covid 19 timeframe.  These packets don't replace your curriculum, however may help to fill in for review. 

  • You might also use these worksheets for substitute days when you have to be out. 🏖
  • Ok, ok! I know I am stretching it here with the beach scene, but wouldn't it be nice?


  • This packet can also be used for teacher conference days when it is a planned day for students to be at home. 

Thank you for stopping by! I hope you have a lovely day!

To see more information about snow day packets or to purchase, click 


How to Teach Counting Money. A Little Book About Money

There are many ways we can practice counting money. I am always looking for new and engaging activities to teach my firsties how to count money. But counting money is good for any primary student.  I was driving home from work one day thinking about another way to get money across to my students when I thought of making these little books about money.  

We have already covered pennies, nickels, dimes, individually in my class.  Quarters are not one of our first grade standards, so I did not cover quarters at first. But my money books have quarters ready to count for when that time comes.

How to teach money:

I start with a money reward system in my classroom all year, but you wouldn't have to do this all year.  Maybe a few weeks to a month.  I give pennies for positive reinforcement.  On Friday's my students get to eat in the classroom at lunch if they have 10 classroom pennies. To ensure they have pennies, make sure you have ample opportunities for students to earn pennies. The following are a few ways I offer pennies as incentives.  You may have other ways to offer pennies that are unique to your classroom.

a.  Completed work in the morning, centers, or even homework

b.  Walking in a straight line with no talking (the whole class can earn a penny each)

c.  Answering questions during math or a reading lesson.  I pull this out when it seems engagement is low.  "I will give a penny to someone that has the answer to problem 3."  

d.  This is my favorite! Dance parties on Go Noodle. Check out Gonoodle.com if you want to know more about kids dance. The best mover gets a penny! You really have some moves? 2 pennies. This gets the shy or hesitant dancers up and moving.  However, there are always that one or two that choose to sit.  That's ok. There are times I give all the movers and shakers a penny, and other times I pick 1 girl and 1 boy, or just one overall.  

e.  Finishing goals at the end of the week. Our corporation requires that we meet certain amount of minutes on a designated computer program.  My students are aware of this goal every Monday.  Once they meet that goal, they can get a penny.

f.  Classroom jobs

There are so many reasons you can offer pennies.  Give your students a set time they can count their pennies, or they will be trying to count during math class or in a reading groups. When we teach pennies explicitly, of course that is a perfect activity to count their pennies daily. 

But due to me rewarding pennies all year, I allow them to count their pennies at the end of the day during/after packing up.  They may also count them in the morning during unpacking before a set time when we start our day.  Then they must put their pennies in their plastic crayon boxes for safekeeping. 

Tips to consider: If your student loses a few pennies or their whole penny bag. Pre-teach a lesson and dramatize that you are in Wa-wa with your children.  You lose $20 somewhere in the produce by the bananas. You go back and can't find it. Sometimes you are lucky enough that someone sees it and hands it back to you. However, if you don't find it, Wa-wa cannot give you the $20.  I do not replace lost pennies.  If I discover a theft, consequences of the person that took the money are that they will have to turn their money into the 'bank.'  I must be absolutely certain they took it, from a confession or other factors.   I can then return the money to the student that lost it.  If not, unfortunately, it is lost.  I have learned that if they keep their money in the plastic crayon box, it rarely gets lost or comes up missing.  This is good for learning about pennies and responsibility for students to keep track of money. 

Teach the penny explicitly for one week. Talk about what it looks like front and back, how to count, and then several activities such as My Money Book Penny FREE! Click on the picture to receive this FREE Product!


Teach the nickel the same way.  Talk about what it looks like, how to count, and then finalize with several activities. My Money Book: Nickels! Click on the picture to see more or to purchase!


Teach about the dime. Below is the My Money Book Dimes!

My Money Book Dimes: Click on the picture for more information or to purchase!


Lastly, you can teach mixed coins, review what the coins look like, but make sure to teach that as they change coins going from largest value to smallest value they need to change how they are counting. (It is very helpful if you have already taught how to count by ones, fives, tens, and twenty-fives previous to teaching money.) 


👉If you would like this book activity to teach mixed coins, click here to purchase or to receive more information.

6 Fun Solar System Planet Activities To Do With Students

 Are your students excited about planets?  My first graders are intrigued by the Solar System! When I begin teaching about the solar system, I start with gravity! 

One of my favorite activities to teach with gravity is with balloons! Before you begin, give students a little background information about gravity.

1.  Make an anchor chart.  Draw a tree with an apple falling down.  Explain that Sir Isaac Newton was an English mathematician who discovered gravity when he saw a falling apple while thinking about the nature of physics.

2.  Explain what goes up must come down! Give each student a balloon with their name on it in case it bounces away you'll know who to return it to.  Allow them to bounce them up and watch them come down. While they are jumping around, make your way around the room repeating the idea that your students are experiencing gravity.


3.  Make it extra fun and put some fun music on. There are some really cute kid songs about gravity on YouTube.

4.  Set up a couple of sensory bins. Place laminated copies of planets in rice.  Have students look for them and then check them off on a checklist.  You can make these or find them here!

After I did this activity, I actually found some planet erasers at Oriental Trading.  I don't have an affiliate, just sharing I saw them.  There are also some on Amazon.  You could also make the planets by painting rocks.  Either way, your students will love searching for the planets. Can you tell I am excited? 


5.  Make a Solar System hat!! That's tons of fun to wear home!


6.  Color all the planets as you study them!


Thanks for hanging out with me and I hope you have the best time studying the planets! :)

🠊For more Solar System Activities, information, or to purchase, click here!


12 Easy Activities to Do With Plant Life Cycle

Prepare for your plant life cycle week with this activity packet!

Start your week investigating seeds.  Collect all kinds of seeds either with foods or packets.  Pass these seed out and make an anchor chart with them.  

Teach four things a seed or plant needs to grow with this teaching poster.  Students can color the black and white copy for their notes.  Follow up after or the next day with cut and glue.


This was so fun! I set up a sensory bin with rice.  Yes, I bought one of those $1 plastic shoe boxes, filled it with rice, and buried the laminated cards in the rice.  I gave students a check sheet for when they found each of these items.  If you have real objects to hide, that would be great.  For example, a silk flower, stem, and leaf, would be amazing to use too!

Print off a fun book to read aloud and have students read and color. 


These hats will also help students understand four things a seed needs and the parts of a plant!


Play a game of charades or call out these clues for students to act out.  For example, ask students to stand up on the rug and act out how they would feel if this happened. "How would you act if you were a tree in a gentle breeze?"  "How would you act if you were a leaf on a hot summer day?"


Have students close their eyes. Read the clues.  Ask students to write what the plant is with "What am I?"  After writing, illustrate your answer. 


Use these charts as references for your teaching or station work.


👉Click HERE or on the pictures for purchase or more information.


Teach Time to the Hour with 5 Easy Activities

It's that 'time' of the year! Haha! See what I did there? It's time to teach your students all about the analog clock to the hour. Half hour will be addressed in another post SOON.  I tried hard to put both hour and half hour here, but it just got too confusing.

Do you wonder where to start or how to begin teaching time? Do you fear that you won't be able to teach the analog clock? I have had the same worries. I have spent a long time teaching this concept only to realize that I didn't always get the concept across on assessment day. 

I have also rushed teaching hour and half hour together all in the same week.  After years of teaching this, I have discovered a few tricks and created activities to help me teach and assess this concept and hopefully these activities will help you, too!


Activity 1:  Teaching Analog Time to the Hour

It is essential to teach time using an actual analog clock in hand.  In elementary schools, many times they have the big yellow clocks.  But your classroom may not have a teaching clock or you may be a homeschool parent. No worries! Grab that analog clock off the wall or purchase one at the dollar store! You can do this!

Wind the clock around until the small hour hand is on any number.  For the sake of this post, I will say 10:00.  Wind the minute hand around to the 12.  Explain the small hand is the hour hand.  The large hand is the minute hand.  Interaction is key here.  Ask your students or child to come up and point to the hour hand.  Then ask another child to point to the minute hand.  Tell them for now we are only going to watch that little guy, the hour hand. We'll worry about the minute hand later! For now, he (the minute hand) will always stay on the 12.

Continue with this social story. Be sure to use your dramatic voice and play it up big time! This little hour hand is so bossy!  He always calls out the hour or first number we say! Wherever he is, that's what we have to say because he is soooo bossy!! (For now, let's just focus on the hour. I know the hour hand moves at half hour, but that is too much information to share right off the bat.) Ask what number that little bossy hour hand is on!  That's right, the 10! So the hour hand makes us say 'ten o'clock!'  See how bossy the small hour hand is? And the big minute hand just sits on the 12 for now. When the big minute hand is on the 12, we say O'CLOCK! 

Move the hour hand around to another number such as 2, and the minute hand to the 12.  Keep up your drama with the bossy hour hand.  Ask where is that bossy hour hand? That's right he is on the 2, so we say 2:00! I repeat this activity daily for a week at the math calendar station, having students guess the time to the hour for 3-4 examples until I am sure they understand time to the hour. Don't rush this part.  They need to have the hour concrete before moving to the half hour.  


Activity 2: Students Practice the Hour

It is important students get to practice with their own clock.  I am blessed to have a small yellow clock for each of my students to practice.  If you do not have little clocks, let students take turns practicing with your analog clock you grabbed off the wall, praising and correcting as you continue to teach individually.  

Call out a time to the hour and let them practice moving the hands around until they find the time you call out.  In whole group in my class, I call out 3-4 times.  They have to raise their clocks up to show me.  I can quickly scan the room to see who may need assistance.  I continue to call out times to keep others busy, checking them, and walk over to direct any students that are struggling with the concept. This can also be done in small groups.


Activity 3: Race to Find the Time

I think you see where this is going!  Haha! After they have practiced several times to the hour with their own clocks, call out a time and have them race to see who finds it first.  You must explain this is just a game and not everyone can find the time first.  Also after doing this for many years, there are some years I have students that are so competitive and cannot lose.  In this case, it would be best to do this in small groups so you can be close to quickly console and teach about winning and losing.  But for the most part, my students LOVE to play this game! This is the year of COVID, so for now we are doing most of everything whole class.

Activity 4: Color the Time

This is a FREE product that will help you teach time to the hour.  Make sure to stick to the hour for now.  Half hour is also included for future teaching. Students will need crayons and a copy of the coloring sheet.  Call on students to tell you the color for the time in the key.  Click here for this FREE product or on the picture below.


Activity 5: Practice Writing and Drawing the Time FREE

In this product, you can have students identify the time and write it digitally to the hour.  Half hour is also included but for now, stick to the hour.  I like to double side these.  We practice one side together, and they do the other side independently. This is a great way to see who may need remediation.  Click HERE to receive these practice pages! Or you may click on the picture below. For the full product, the links are provided below.


Click on the following links for more time activities in my Teachers Pay Teachers store!
**Need to teach time to the hour AND half hour before some of the following activities.**


If you have ANY questions or suggestions,  I would love to hear your feedback. Do you have a tip you would like to share? Post in the comment section below.  Have fun!!


There was an Old Lady Who Swallowed BUNDLE Reading Comprehension Questions and Reading Strategies

Have you ever found yourself at a loss when trying to get your students engaged with reading comprehension questions? Or frustrated with th...